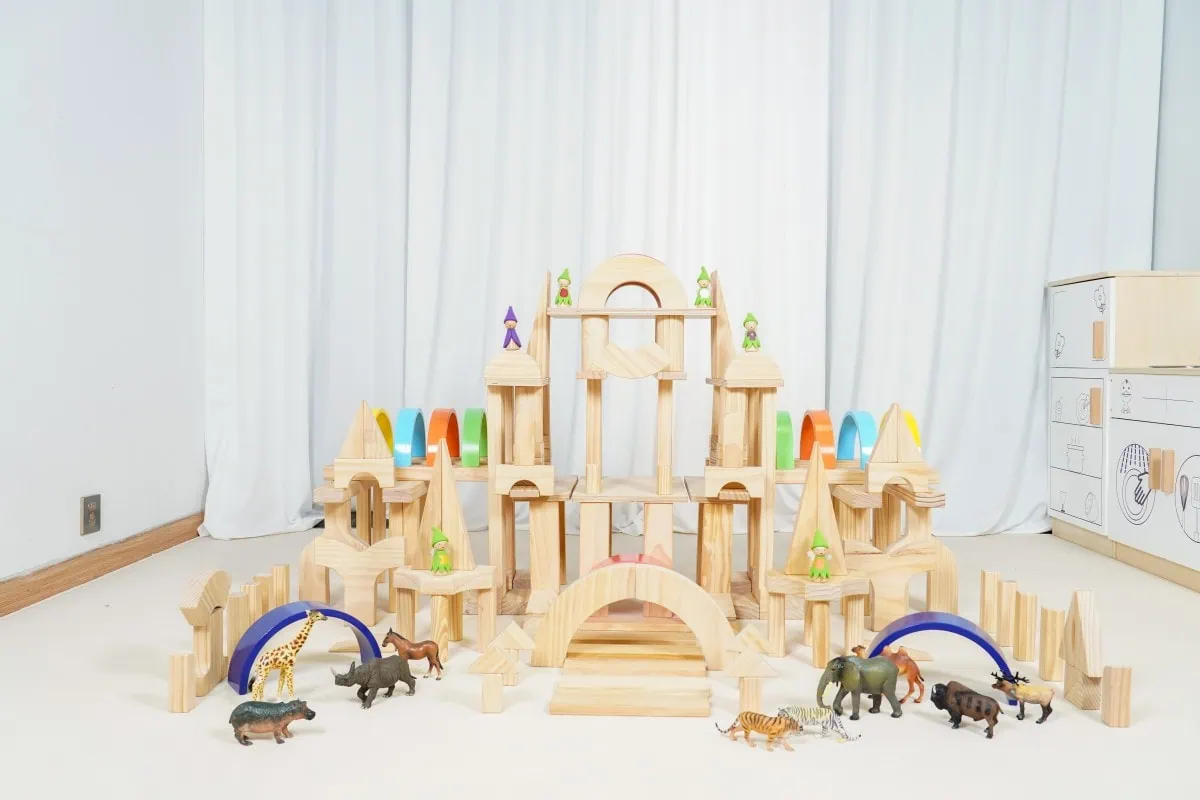
A well-planned kids obstacle course can give children opportunities to crawl, step, balance, climb, carry, reach, and move through space in different ways. For preschools and daycare centers, it can also support flexible active-play programs when the equipment is appropriate for the children, correctly installed, actively supervised, and regularly inspected.
However, an obstacle course should not be created by simply placing several attractive products in a line. Age grading, equipment classification, fall height, protective surfacing, spacing, traffic flow, accessibility, storage, and maintenance must all be considered.
This guide presents nine practical steps for educators, preschool groups, distributors, importers, and project buyers planning an indoor or outdoor obstacle course.

What Is a Kids Obstacle Course?
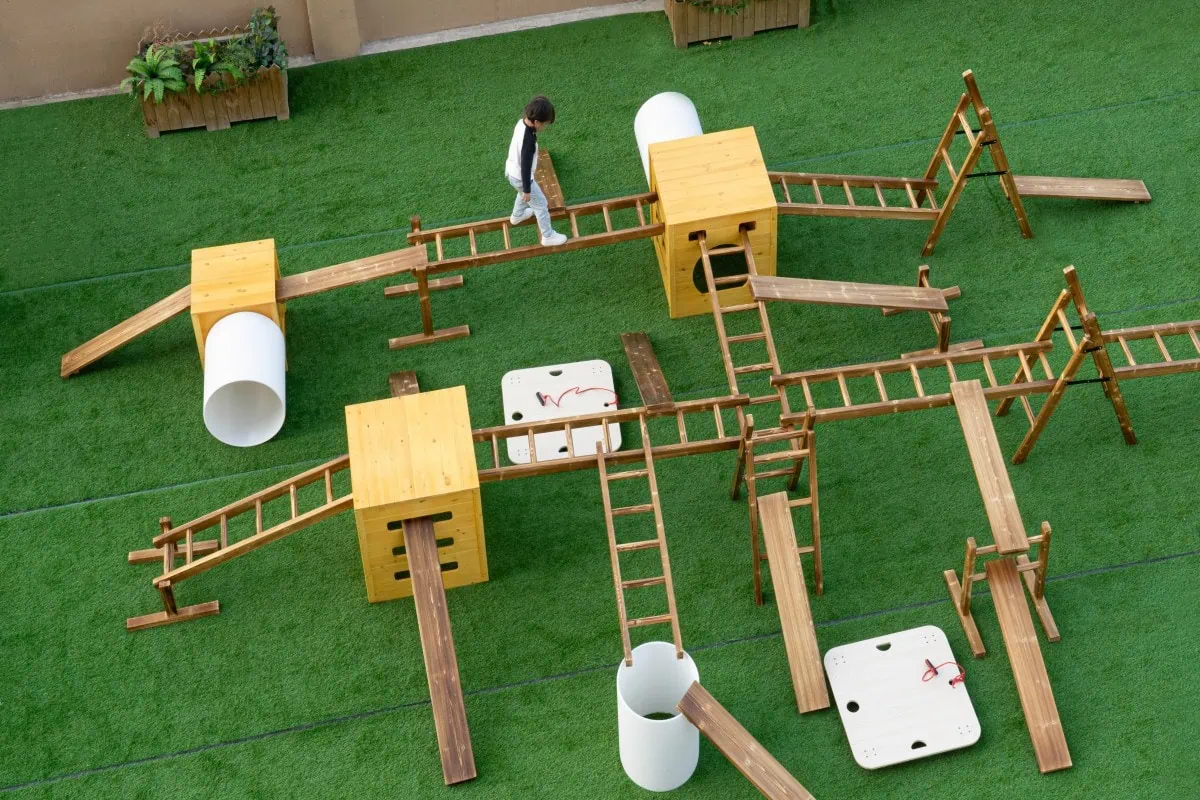
A kids obstacle course is a sequence of movement experiences that children navigate individually or in small groups. Depending on the intended age, environment, and equipment, a course may include:
- low balance paths;
- stepping elements;
- ramps and slopes;
- tunnels and crawling spaces;
- platforms and bridges;
- climbing components;
- hurdles or movement markers;
- loose parts for carrying or arranging;
- start, finish, and transition points.
Some courses use portable components that educators rearrange for supervised sessions. Others include permanently installed playground equipment. These configurations may fall into different product categories and may not be subject to exactly the same standards, installation rules, or inspection procedures.
What Can Children Practice on an Obstacle Course?
Children ages 3–5 should have opportunities to be physically active throughout the day. An obstacle course can contribute to that goal as one part of a broader program that includes free play, outdoor exploration, music, movement, games, and rest.
Depending on the course design and the child’s development, obstacle-course play may provide opportunities to practice:
- Balance: adjusting body position on stable, appropriately designed surfaces;
- Coordination: combining hand, foot, and whole-body movements;
- Spatial awareness: moving over, under, around, between, and through obstacles;
- Motor planning: deciding how to approach a movement sequence;
- Grip and body strength: holding, climbing, pushing, or carrying within appropriate limits;
- Communication: describing movements and listening to safety instructions;
- Turn-taking: waiting for sufficient space before entering the next station;
- Persistence: repeating a manageable challenge and trying a different approach.
These are learning opportunities rather than guaranteed outcomes. Equipment should not be marketed as producing a specific developmental improvement or as a substitute for professional physical or occupational therapy.

Step 1: Define the Users and Intended Environment
Before selecting equipment, identify who will use the course and where it will operate. Important questions include:
- What is the intended age range?
- Will children of different ages use the area at the same time?
- Is the course intended for indoor, outdoor, or temporary outdoor use?
- Will it be portable, reconfigurable, or permanently installed?
- How many children may enter the course simultaneously?
- What level of adult supervision will be available?
- Does the program include children with different mobility, sensory, or communication needs?
- How frequently will the equipment be used?
A product being described as “for children” does not make it suitable for every age or facility. Follow the age grading, user limits, instructions, warnings, and intended-use information provided for the specific model.
Step 2: Select Developmentally Appropriate Challenges
Children of the same age can have different movement experience, confidence, body size, and support needs. Course difficulty should therefore be adjustable without placing children in situations they cannot enter or leave independently.
A useful course normally includes a combination of:
- an easy entry activity that helps children understand the route;
- several movement types rather than repeated versions of one skill;
- more than one appropriate way to complete selected sections;
- resting or bypass options;
- a clear exit that does not cross the next participant’s path.
Avoid using universal height charts from unrelated products. The suitability of a beam, platform, climber, or bridge depends on its complete design, fall height, surface, dimensions, openings, hand supports, installation, testing, and instructions.

Step 3: Confirm Product Classification and Requirements
The applicable requirements depend on the target market, product design, intended age, installation method, use environment, and whether the item is classified as a toy, activity toy, movable play component, public playground equipment, furniture, or another type of children’s product.
For example, permanently installed playground equipment in a preschool may be evaluated differently from a portable indoor balance set. Standards that may be relevant in certain markets include ASTM F1487, ASTM F2373, ASTM F963, EN 1176, EN 71, ISO 8124, surfacing standards, accessibility requirements, and destination-specific regulations.
This does not mean every standard applies to every product. Professional buyers should confirm the correct classification with qualified compliance specialists and local authorities.
Before ordering, request:
- product-specific test reports;
- the exact tested model and configuration;
- test standard and edition;
- laboratory and test date;
- material and coating reports where applicable;
- age grading and user limitations;
- installation and maintenance instructions;
- labels and warnings required for the destination market.
Step 4: Plan the Route and Traffic Flow
A good obstacle course should be easy for children and supervising adults to understand. The beginning, direction, bypass points, waiting area, and exit should be visually clear.
- Use one-way movement where opposing traffic would create collisions.
- Keep waiting children away from active landing and exit areas.
- Do not direct a running activity toward a climber, doorway, fence, or hard object.
- Provide enough room for children to leave one station before the next child enters.
- Avoid hidden turns and enclosed areas that reduce supervision.
- Keep emergency and general circulation routes open.
- Separate wheeled activities from crawling and balancing stations.
Course spacing cannot be determined by one universal measurement. Use zones and equipment separation should follow the specific product instructions, relevant standards, fall heights, expected movements, and local requirements.

Step 5: Provide the Correct Use Zone and Surfacing
Falls are a foreseeable part of active play. Equipment with an elevated play surface or foreseeable fall should be installed over an appropriate impact-attenuating surface extending through the required use zone.
Ordinary carpet, artificial grass, thin foam tiles, soil, or grass should not automatically be treated as compliant protective surfacing. Suitability depends on factors such as:
- the equipment’s fall height;
- the surfacing material and installed depth;
- impact-attenuation performance;
- maintenance and displacement;
- drainage and environmental exposure;
- accessibility requirements;
- the applicable standard and local regulation.
The CPSC Public Playground Safety Handbook identifies protective surfacing as a critical part of reducing the risk of serious injuries from falls. Final surface type, depth, installation, and extent should be determined for the specific equipment and project.
Step 6: Design for Sight Lines and Active Supervision
Active supervision means more than being present near the course. Adults should position themselves so they can see and hear children, anticipate behavior, scan the complete route, and respond when necessary.
- Check visibility from all normal staff positions.
- Avoid placing tall equipment in front of lower crawling stations.
- Assign supervision zones during group use.
- Count children before, during, and after transitions.
- Control the number of children entering the course.
- Watch for loose clothing, cords, jewelry, or other entanglement risks.
- Stop use when equipment, surfacing, weather, or behavior creates an unsafe condition.
The Head Start active supervision framework emphasizes setting up the environment, positioning staff, scanning and counting, listening, anticipating children’s behavior, and engaging or redirecting when necessary.

Step 7: Include Accessible Ways to Participate
An inclusive obstacle course does not require every child to complete every station in the same way. It should offer meaningful choices that allow children with different abilities to participate alongside their peers.
Possible planning approaches include:
- an accessible route to the activity area;
- stable ground-level movement stations;
- transfer points where appropriate;
- different heights and reach ranges;
- visual, verbal, tactile, or picture-based route cues;
- bypass options around selected challenges;
- activities involving carrying, aiming, sorting, or signaling in addition to climbing;
- sufficient maneuvering and resting space.
Accessibility requirements vary by location and project type. In the United States, the U.S. Access Board’s play-area guidance explains accessible routes and access to ground-level and elevated play components.
Step 8: Choose Materials for Indoor or Outdoor Use
Indoor and outdoor obstacle courses place different demands on equipment. A product should not be used outdoors merely because its surface is painted or coated.
| Planning Factor | Indoor Course | Outdoor Course |
|---|---|---|
| Environment | Controlled temperature but frequent contact and cleaning | Sun, rain, humidity, temperature change, and ground moisture |
| Floor or surface | Protective surface must suit equipment and fall exposure | Requires suitable impact performance, drainage, and maintenance |
| Storage | Portable components may require compact storage | Portable items need secure, dry storage during unsuitable weather |
| Materials | Check finish, edges, hardware, and cleaning compatibility | Check timber, coating, fasteners, drainage, and weather suitability |
| Inspection | Focus on movement, loose parts, wear, and floor condition | Also check moisture damage, coating wear, corrosion, and ground stability |
For wooden obstacle equipment, request information about wood species, panel construction, moisture control, coating, hardware, load testing, outdoor suitability, cleaning, inspection, and maintenance. Terms such as “natural,” “premium,” “eco-friendly,” and “weatherproof” should be supported by specific documentation.

Step 9: Inspect, Maintain, and Revise the Course
Every course should be checked before children use it. Inspection frequency should reflect the manufacturer’s instructions, equipment type, usage intensity, environment, applicable standards, and facility procedures.
Before Each Use
- Confirm that components are correctly positioned and connected.
- Check locks, fasteners, anchors, and anti-slip features.
- Look for cracks, splinters, sharp edges, damaged ropes, or loose parts.
- Inspect the protective surface and remove hazards.
- Check that the route, use zones, and exits are unobstructed.
- Confirm that weather and surface conditions are suitable.
Scheduled Inspection
- Follow the manufacturer’s maintenance schedule.
- Record inspections, defects, repairs, and replacement parts.
- Monitor wear at connections and high-contact surfaces.
- Check timber condition, coating wear, corrosion, and movement.
- Maintain loose-fill surfacing at the required condition and depth.
- Use qualified inspectors where required.
Any component with uncertain stability, damage, missing hardware, or an unsafe connection should be removed from use until it has been correctly repaired or replaced.

Ideas for Obstacle Course Activities
Once the course has been assessed and approved, educators can vary the experience without continuously increasing height or difficulty.
- Movement words: move over, under, through, around, beside, and between.
- Counting route: count steps, stations, objects, or repeated movements.
- Color route: follow selected color markers or carry an object to a matching destination.
- Animal movement: crawl, stretch, step, or move slowly like different animals.
- Delivery challenge: transport a lightweight object through suitable ground-level stations.
- Partner route: children communicate and take turns without racing.
- Child-designed route: children suggest arrangements using components educators have approved for reconfiguration.
Avoid using speed as the main measure of success. Racing can increase congestion and encourage children to enter stations before the route is clear. Participation, planning, communication, controlled movement, and creative use of the course may be more appropriate observation points.
How to Evaluate the Program
Educators can improve the course by recording what happens during normal use:
- Which stations do children select or avoid?
- Where do queues and collisions occur?
- Can children understand the direction of travel?
- Are adults able to see the complete course?
- Do some children need another way to participate?
- Are components being used in unexpected ways?
- Does the course remain stable throughout the session?
- How long does setup, inspection, cleanup, and storage take?
Change one or two elements at a time and observe the result. Difficulty should not be increased simply because children have completed the existing route. Repetition can help children refine movement, confidence, and planning.
Kids Obstacle Course Procurement Checklist
Before requesting a quotation or approving a sample, professional buyers should prepare and confirm:
- destination country and intended product classification;
- indoor, outdoor, portable, or permanent use;
- intended age range and expected number of users;
- available site dimensions and scaled layout;
- existing surface and required protective surfacing;
- desired movement activities and component types;
- accessibility and inclusion requirements;
- material, coating, and hardware specifications;
- product-specific testing and compliance documents;
- assembly, anchoring, installation, and inspection responsibilities;
- individual product and operating dimensions;
- packaging size, gross weight, and container-loading information;
- spare-parts and after-sales arrangements;
- OEM branding, colors, manuals, and packaging requirements;
- delivery destination and project schedule.
A low unit price does not necessarily produce the lowest completed-project cost. Buyers should also compare protective surfacing, transport volume, installation, testing, replacement parts, inspection, storage, and maintenance.
Common Planning and Buying Mistakes
- Buying before measuring: Equipment may fit the site while leaving insufficient use zones or circulation space.
- Using one age range for the complete course: Every component and configuration must be appropriate for the intended users.
- Assuming grass or carpet is adequate: Protective surfacing must be selected for the actual equipment and fall exposure.
- Mixing incompatible components: Pieces that physically connect may not have been designed or tested together.
- Creating a race by default: Speed can increase congestion, falls, and collisions.
- Ignoring accessibility: Participation routes and alternatives should be included during planning.
- Accepting generic certificates: Documents should correspond to the supplied model, materials, and market.
- Skipping daily checks: Portable components can move, loosen, wear, or be incorrectly reassembled.
Frequently Asked Questions
What equipment belongs in a preschool obstacle course?
Common components include balance paths, stepping elements, ramps, tunnels, platforms, bridges, movement markers, and age-appropriate climbing equipment. The final selection should reflect the children, site, surface, supervision plan, and applicable requirements.
Can toddlers and preschoolers use the same obstacle course?
They should not automatically use the same configuration. Age groups may require different equipment, routes, use periods, or separate zones. Follow the instructions for every component and consider differences in size, speed, movement experience, and reaction time.
Is an indoor obstacle course safer than an outdoor one?
Not inherently. Indoor courses still require suitable surfacing, spacing, stability, clear exits, supervision, and inspection. Hard floors, walls, furniture, low ceilings, and restricted space may introduce additional hazards.
How often should equipment be rearranged?
There is no need to change it on a fixed schedule. Rearrange portable equipment when there is a clear educational or operational reason, and inspect every new configuration before use.
What documents should an importer request?
Request product specifications, age grading, instructions, warnings, bill of materials, applicable test reports, traceability information, packaging details, and any destination-market declarations or certificates required for the specific product.
Create Active Play With a Safer Planning Process
A kids obstacle course can be a flexible part of an early learning environment when it offers understandable, developmentally appropriate movement choices. Its value does not depend on making the course taller, faster, or more difficult.
Start by defining the users and environment. Then select compatible equipment, confirm the applicable requirements, plan traffic and use zones, provide suitable surfacing, preserve sight lines, include accessible participation, and establish inspection procedures.

Sing2sky has manufactured wooden educational products since 2008 and supports distributors, importers, early education groups, OEM brands, and project partners. Explore our Outdoor Open-Active Playsets or contact Sing2sky with your destination market, children’s age range, site dimensions, required components, quantities, and compliance requirements.
Final equipment selection, age grading, user limits, use zones, surfacing, installation, inspection, and compliance should be determined from the documentation for the specific products and the requirements applicable to the project location.